
The complete guide
How To Choose And Fit A Bath Pop Up Plug
The problem nobody talks about until it annoys them
You run a bath, get in, and twenty minutes later the water is somewhere around your waist instead of your shoulders. Nothing dramatic happened. The plug just stopped doing its one job properly.
Worn bath plugs fail slowly. The rubber seal hardens and stops pressing flat. The spring in a cheap bolt loses tension and the cover will not stay down. Chrome plating flakes off in little silver chips that end up in the drain. None of it stops you using the bath, but it does turn a relaxing soak into a slow disappointment, and it wastes hot water every single time.
The good news is that this is one of the cheapest fixes in the whole house. A bath pop up plug is a self-contained part. You are not touching pipework, not getting under the bath, and not calling anyone out. You unscrew the old one and screw in the new one.
What a click clack plug actually does
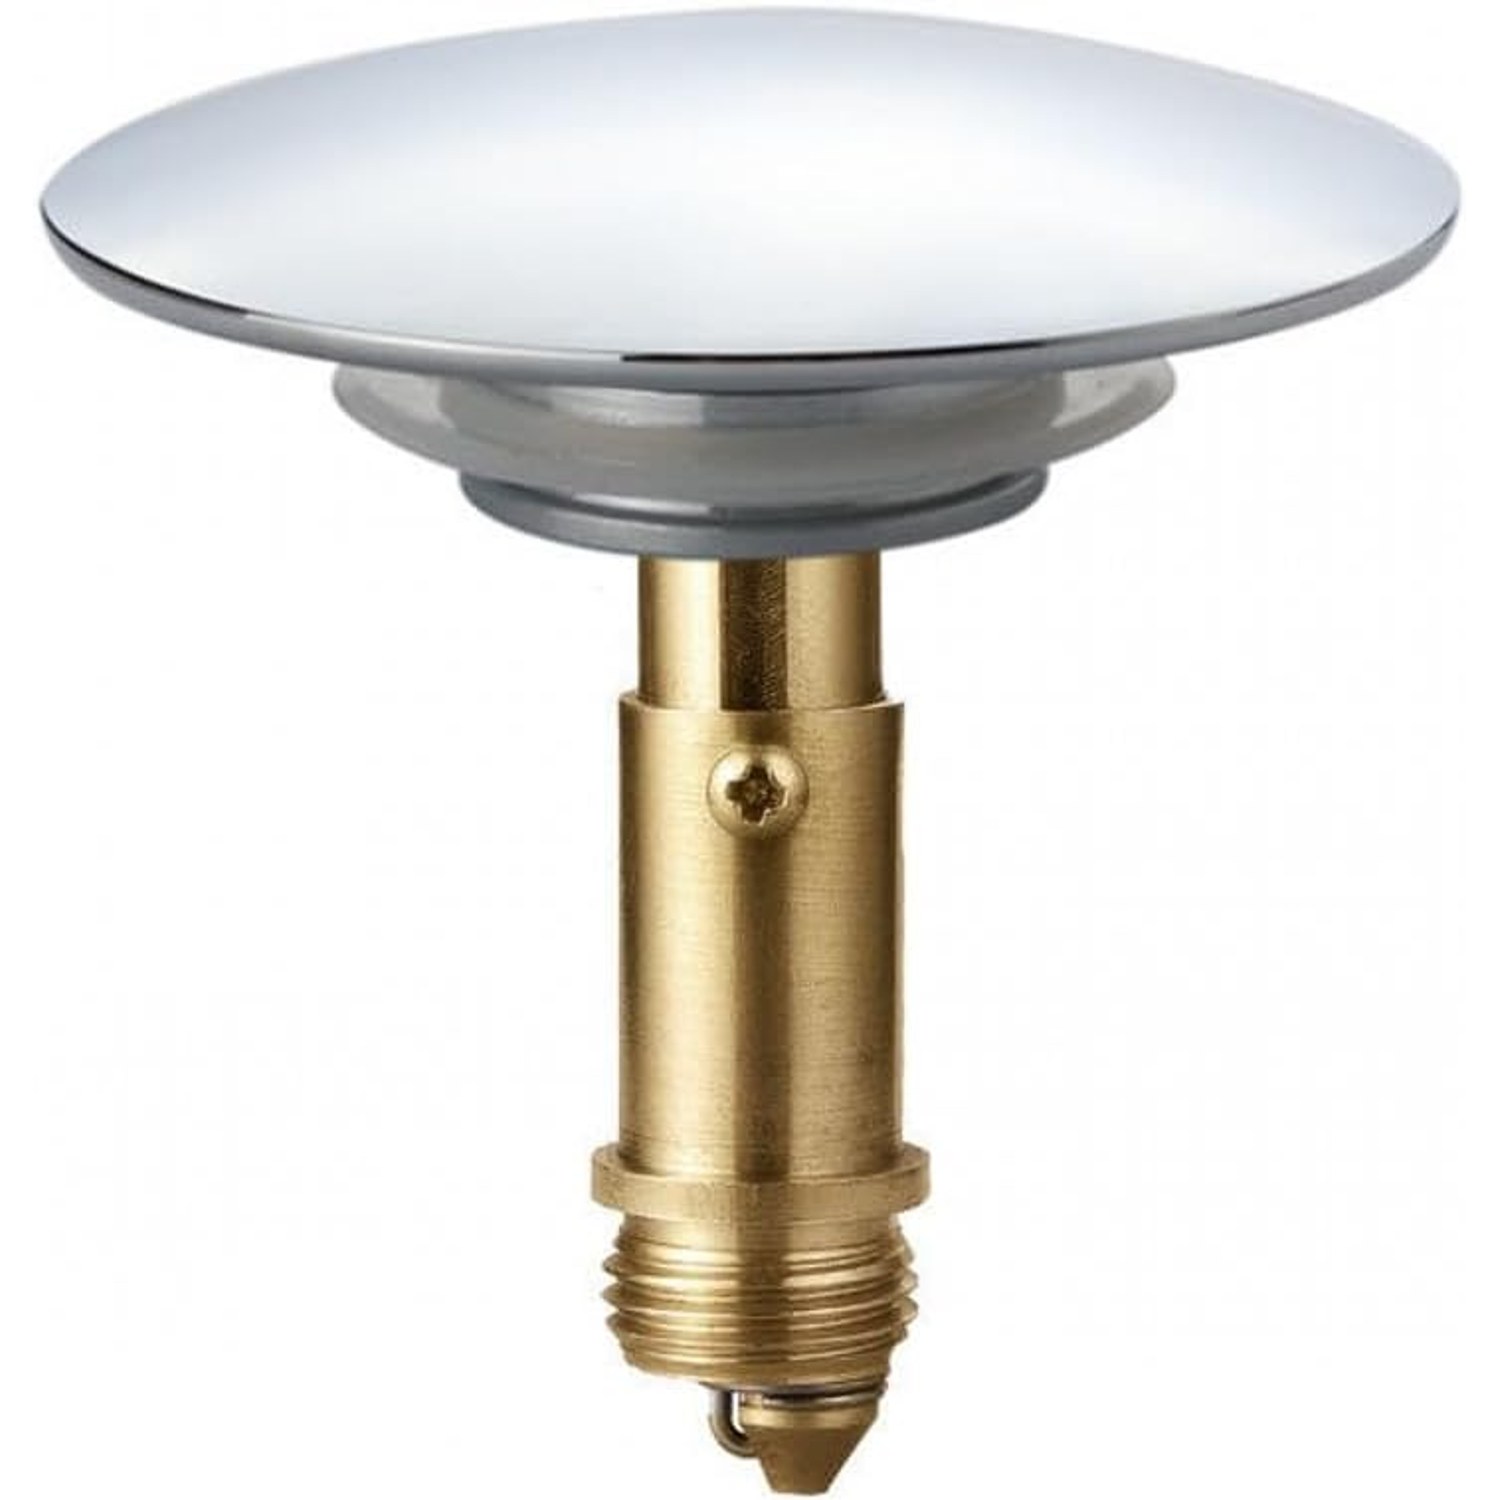
The mechanism is older and simpler than most people assume. A threaded bolt screws into the cross bar sitting in the centre of your bath waste. On top of that bolt is a spring-loaded cover. Press it down and a small catch locks it in the closed position against a rubber seal. Press it again and the catch releases, the spring lifts the cover, and the water runs away.
That click as it latches is where the click clack name comes from. It is not a gimmick. It is you hearing the catch engage, which tells you the seal is properly set.
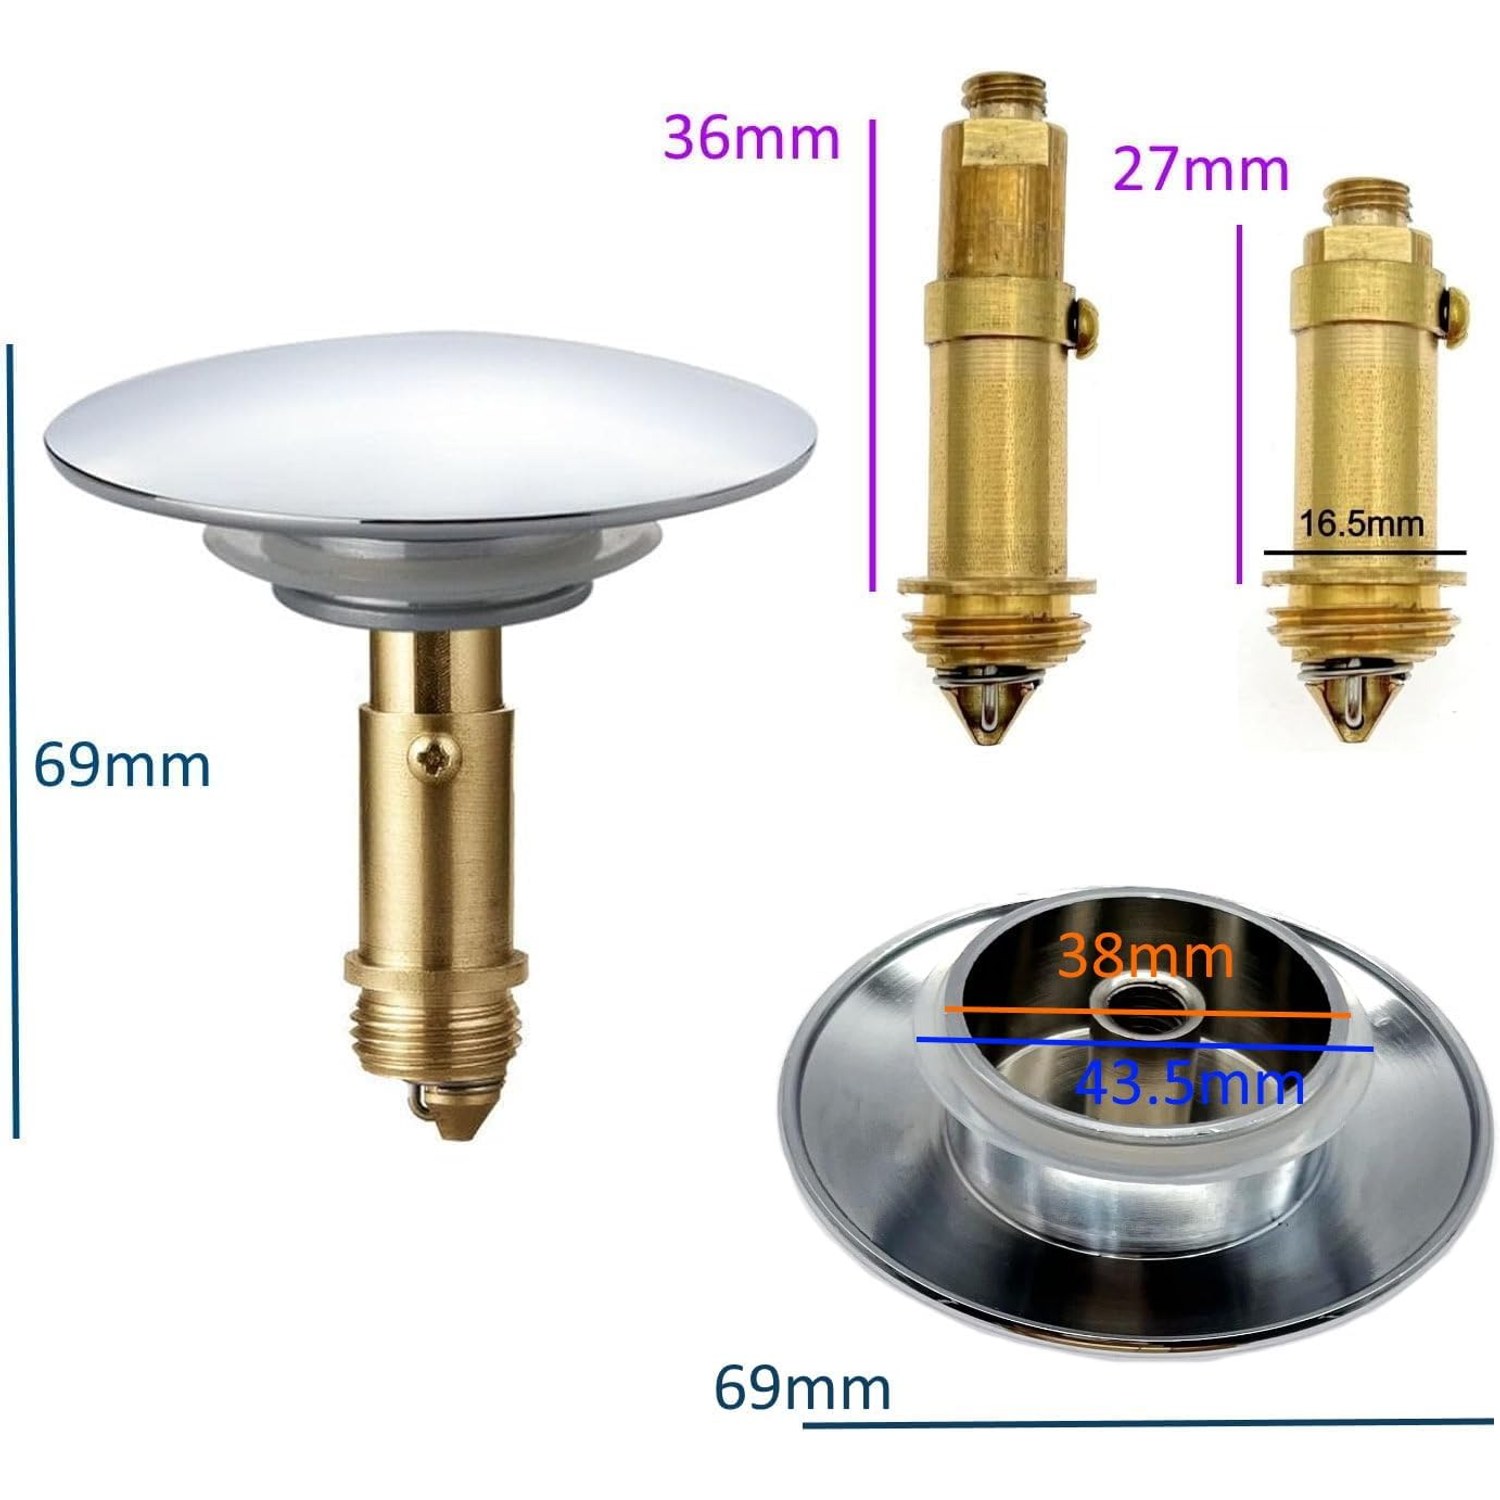
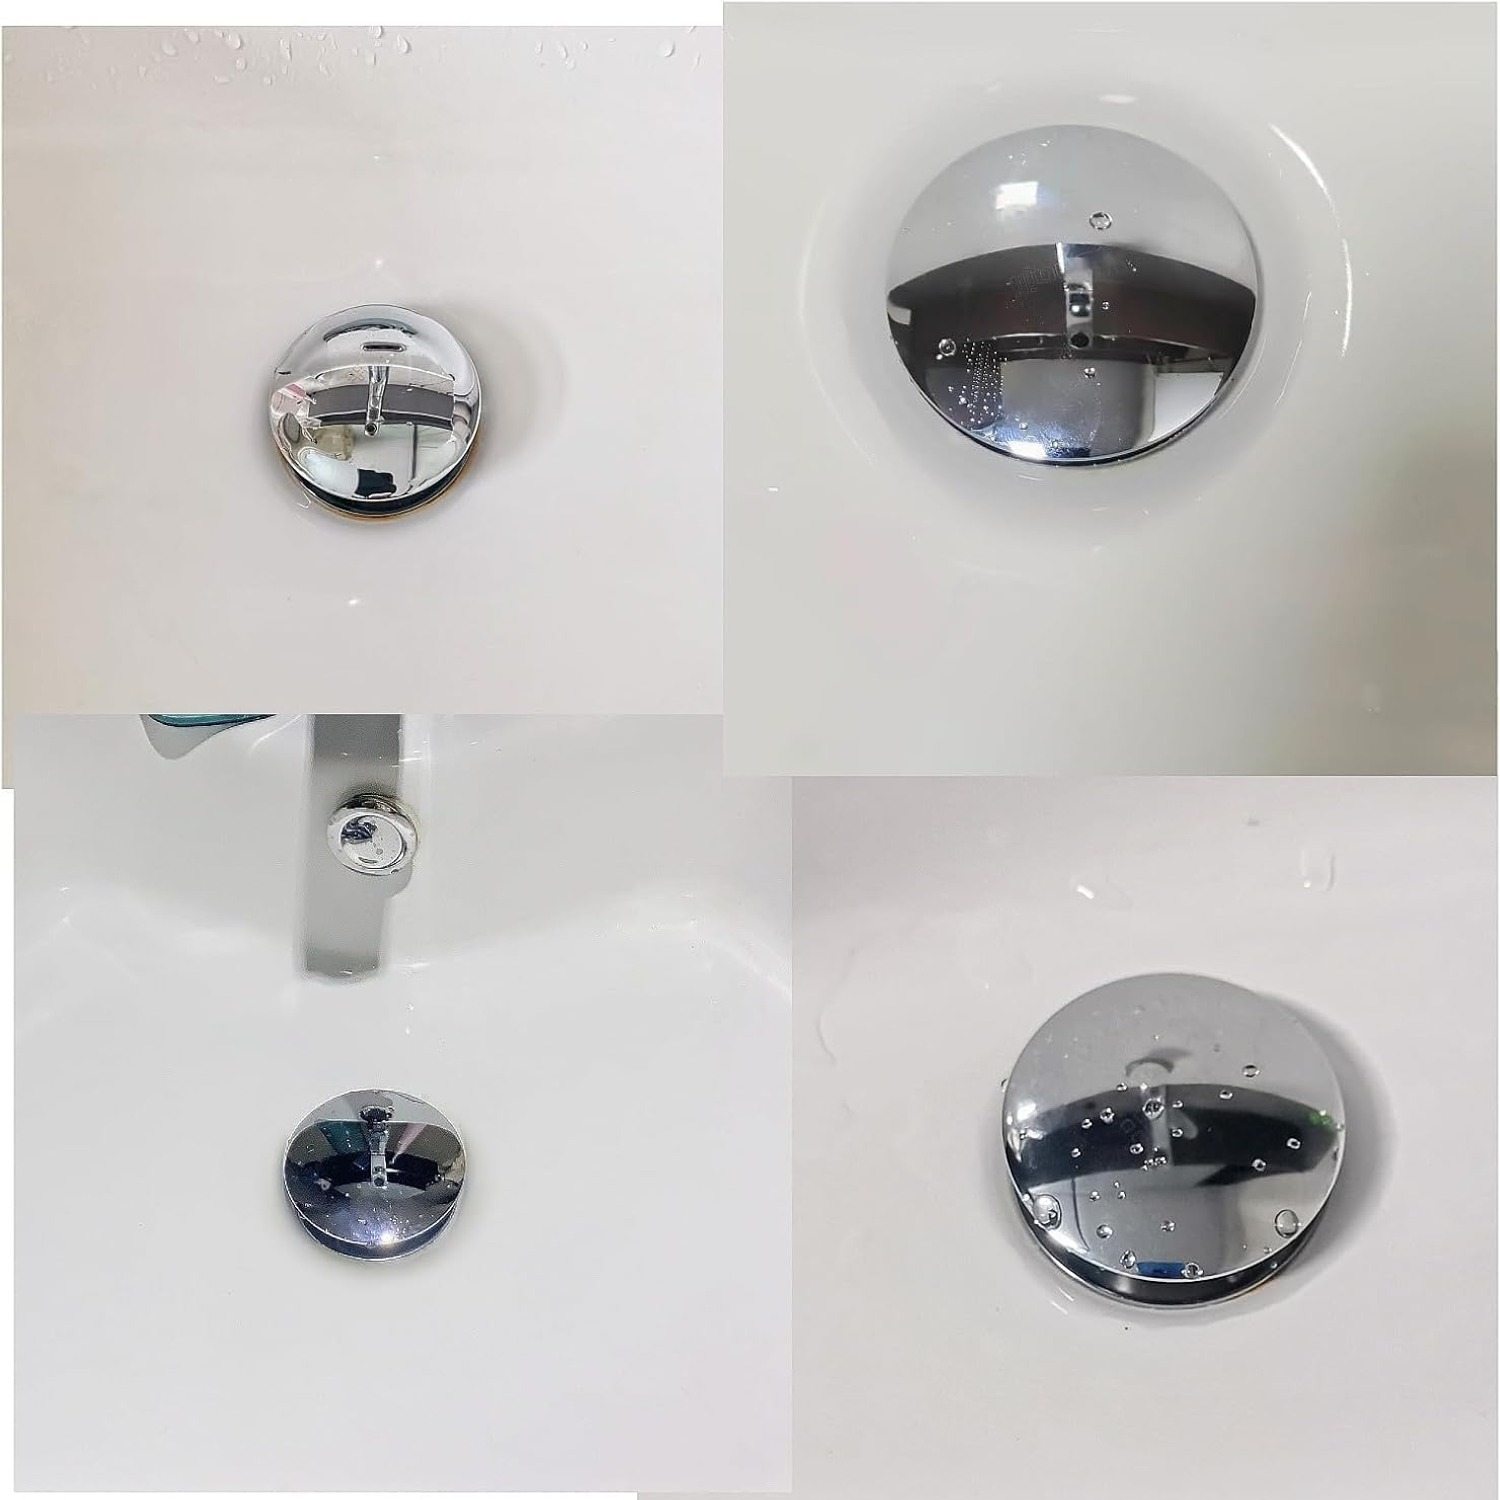
This particular plug uses a 69mm chrome plated alloy cover over a solid brass bolt. The material split matters. The cover is the bit you see, so it is plated for looks and corrosion resistance. The bolt is the bit that works, so it is brass, which stays dimensionally stable in constant damp and keeps its spring strength. Rubber seal rings sit between the moving assembly and the waste to make the actual water seal.
The one measurement that decides everything
Before anything else, measure your drain hole. Not the plug you currently have, the hole itself.
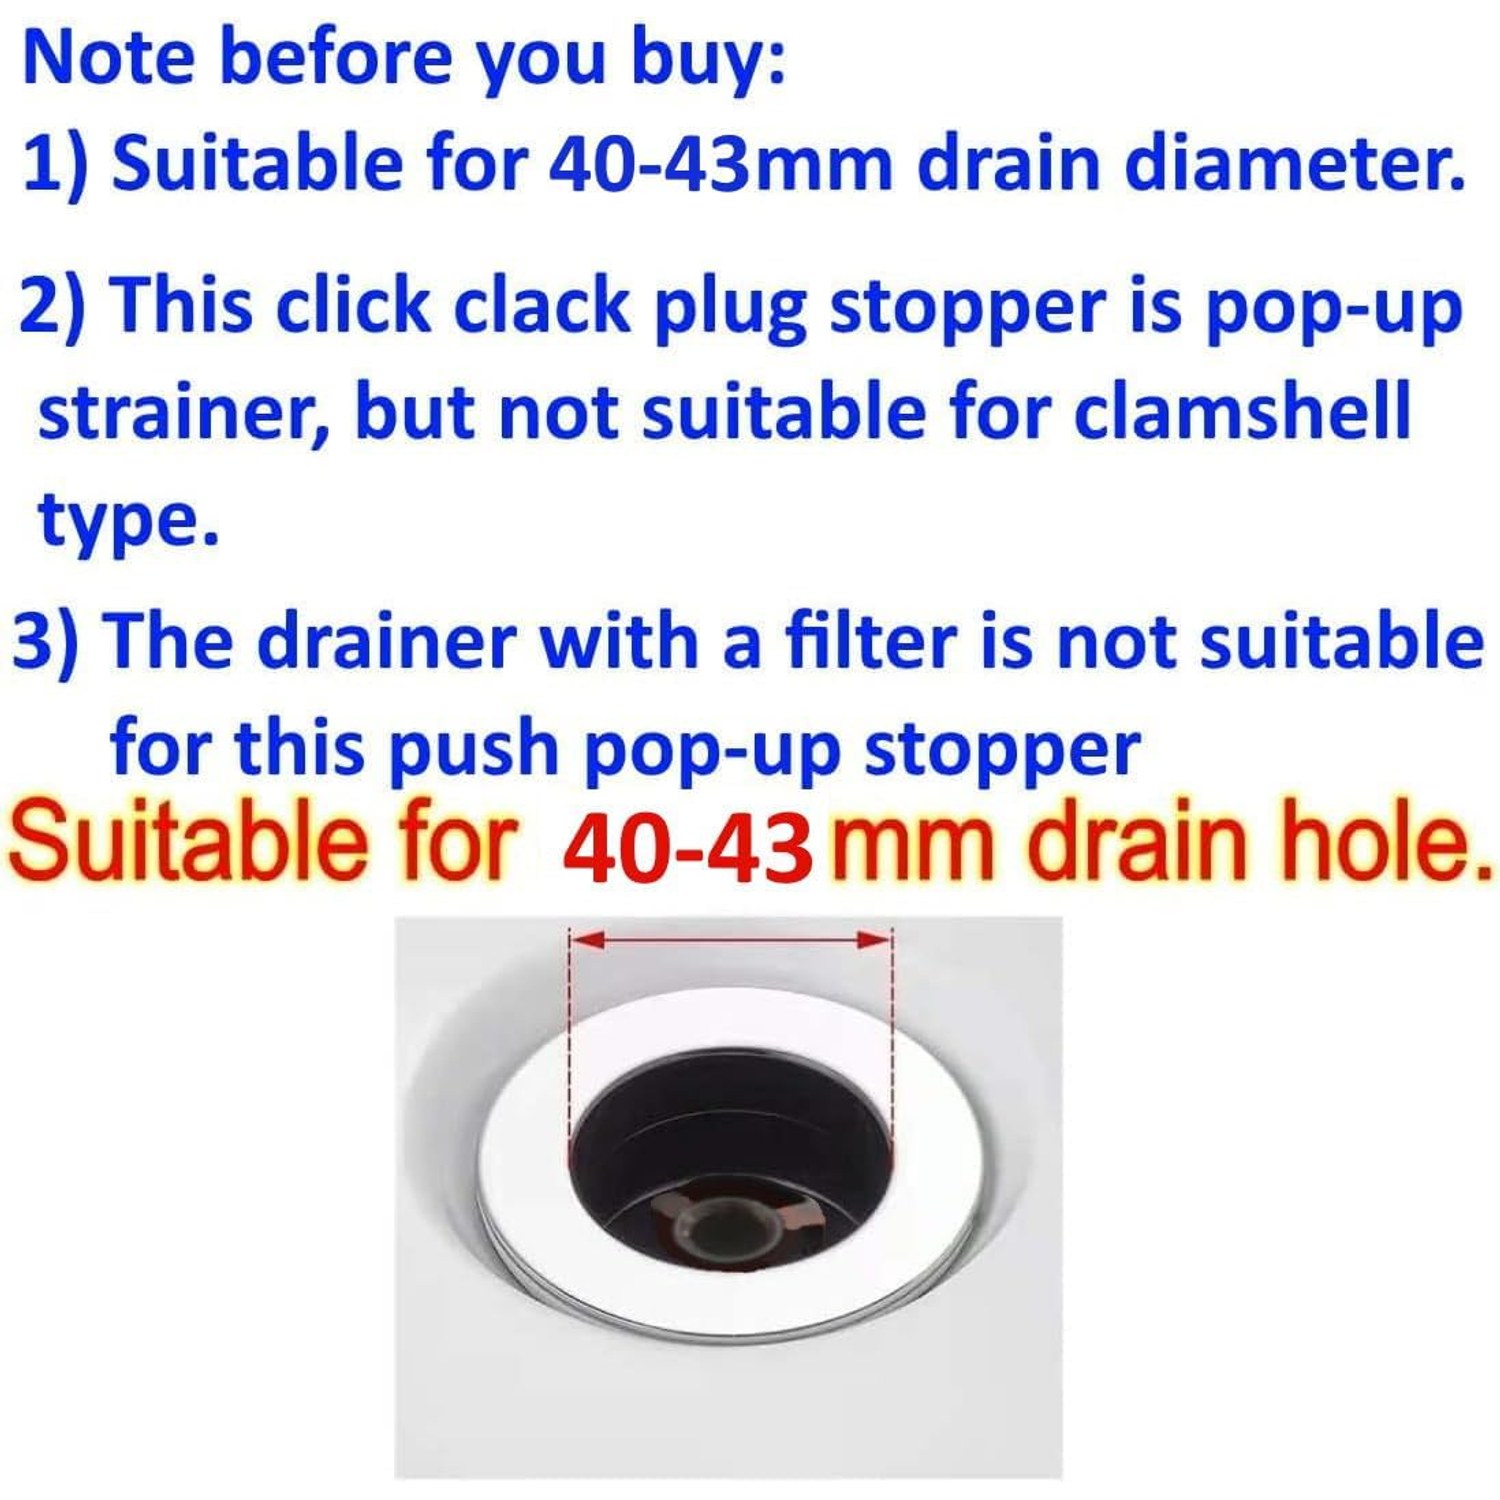
This plug is made for a standard 43mm bath drain. The 69mm figure in the name refers to the visible cover on top, not the hole. Those two numbers confuse people constantly. A 69mm cover sits over a 43mm opening, overlapping the rim so it seals and looks finished.
Take a tape measure, pull the old plug out, and measure straight across the inside of the opening at its widest point. If you get something very close to 43mm, you are in standard territory. If you get something noticeably smaller, you are probably looking at a basin waste rather than a bath waste, and this is not the part for you.
Worth repeating, because it is the single most common ordering mistake: this is a bath plug. It is not suitable for a basin, a cloakroom washbasin or a small hand sink. Those take different, smaller fittings.
Who this suits
Anyone with an existing click clack bath waste where the plug itself has worn out is the obvious candidate. You keep the waste body and the pipework, swap the plug, and the problem goes away.
Landlords and anyone managing a rental get good value here, because bath plugs are a standard wear item between tenancies and the cost of replacing one is trivial compared with the complaints you avoid. Buying a few at once makes sense.
It also suits people doing a light bathroom refresh. New taps and a shiny new plug cover change how a tired bathroom reads without touching tiles or suites. A dull, pitted old plug drags the whole room down more than you would expect.
Who it does not suit: anyone whose waste body itself is cracked, loose or leaking at the joint under the bath. A new plug will not fix a failing waste. If water is appearing on the floor or in the ceiling below rather than just dropping in the tub, that is a different job.
How to choose between the options out there
There are more differences between bath plugs than the pictures suggest.
Core material. This is the big one. Brass cores hold tension. Plastic and thin pressed-metal cores go soft, and you end up pressing the cover two or three times before it latches. If you are comparing a brass bath plug bolt against a plastic one at a similar price, take the brass.
Cover size. Covers vary from around 60mm up past 70mm. A cover that is too small will not sit over the rim properly and will not seal. A cover much larger than needed can look clumsy on a small bath. Matching to your waste is more important than matching to your taste.
Finish. Chrome is the default because it matches the majority of taps and wastes. If your bathroom is brushed nickel or matt black throughout, a chrome cover will stand out. This one is listed as silver from its chrome plated alloy finish.
Serviceability. A plug with a detachable, slotted bolt set is far easier to live with. Hair and soap scum build up under every bath plug ever made. Being able to unscrew it, rinse it and refit it in two minutes is the difference between a plug that works for years and one you throw away in a year.
Fitting it without any drama
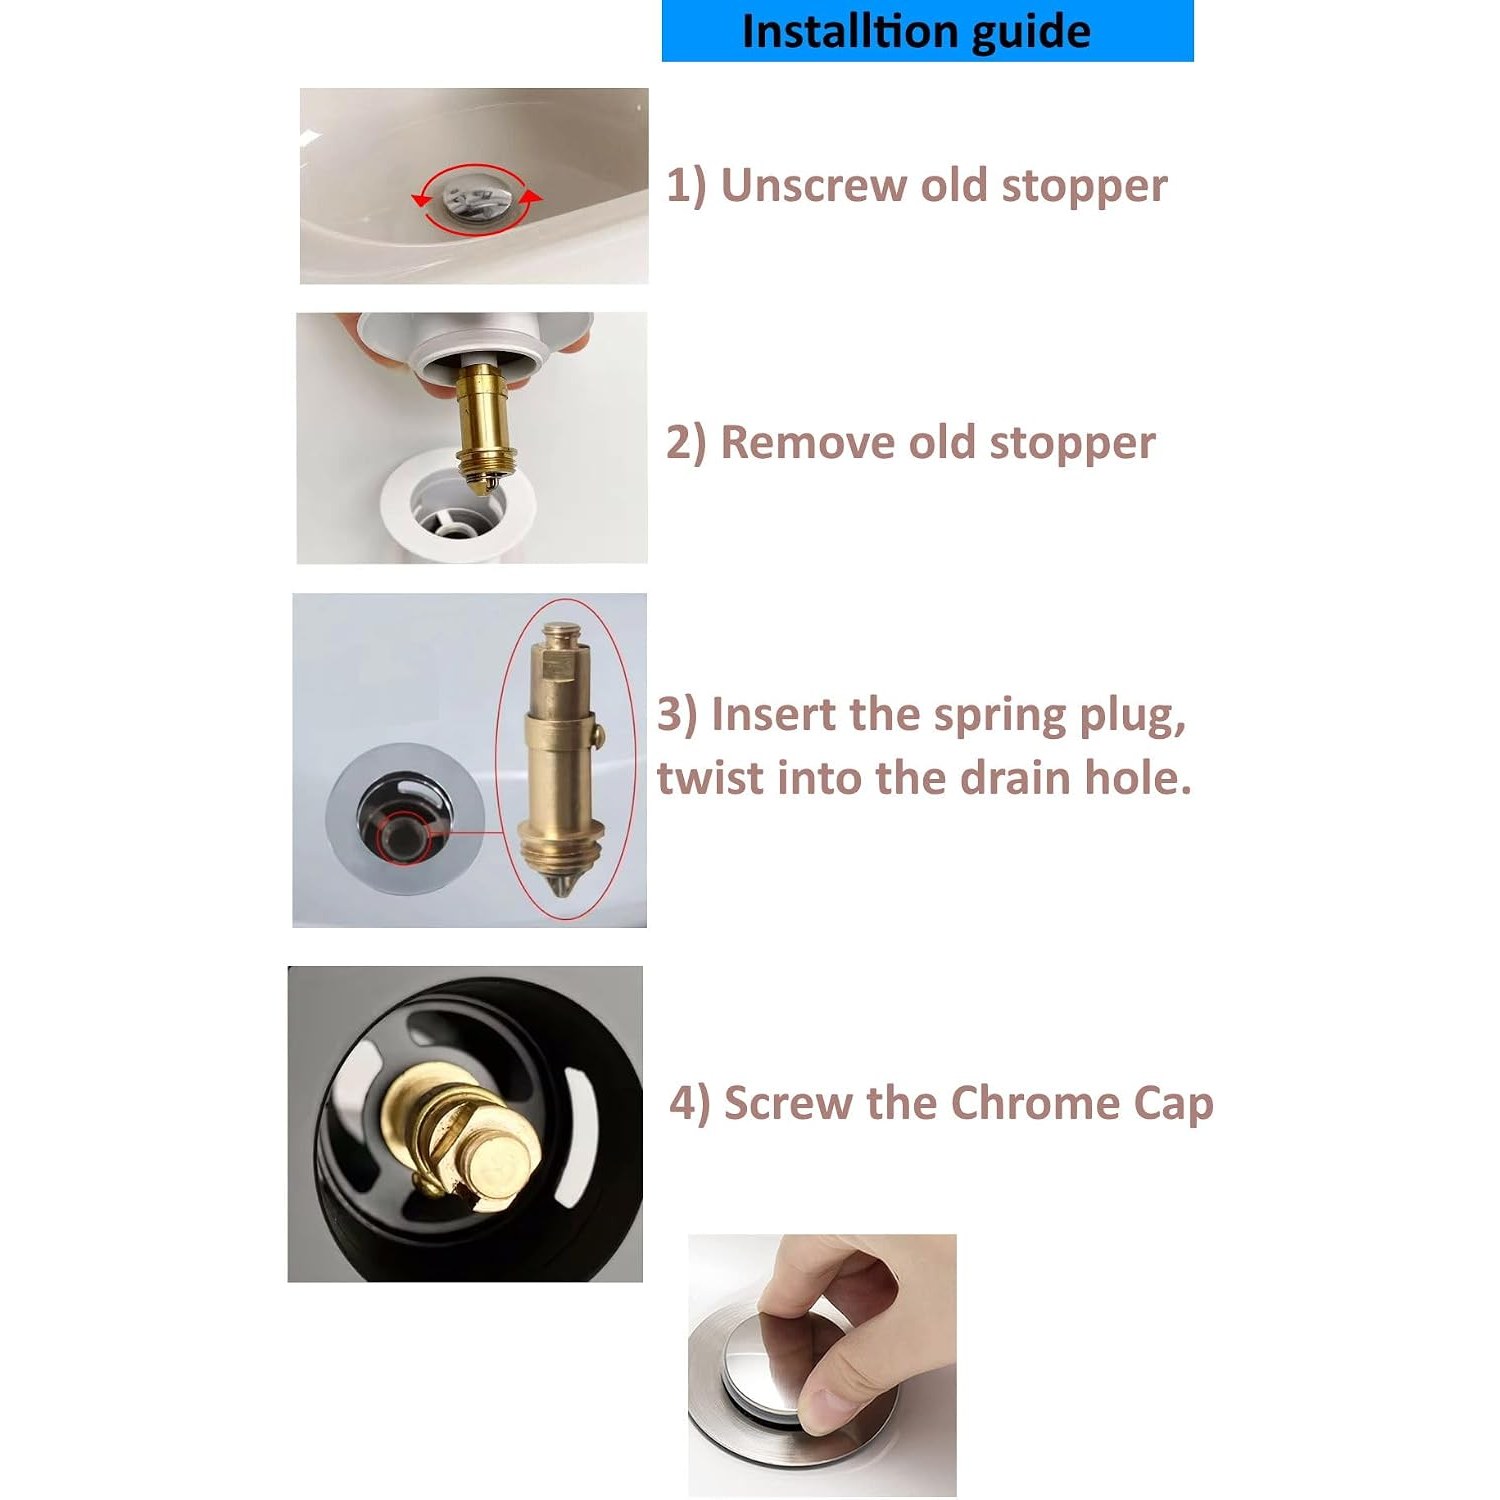
Pull the old plug out. If it is a screw-in type, turn it anticlockwise until it comes free. Some are stiff from limescale, in which case a gentle wiggle while turning usually breaks them loose.
Clean the seat. Wipe around the rim of the waste opening and clear out any hair or grey sludge sitting in the cross bar. A seal only works against a clean surface.
Thread the new bolt in by hand, turning clockwise. Go until it feels seated, then stop. Over-tightening is the most common fitting error, and it prevents the cover rising high enough to drain quickly.
Test it. Press down and listen for the click. Run a little water and check the level holds for a few minutes. Press again and watch it drain. If the water is sluggish, back the bolt off a fraction and retest. If it will not latch, tighten it a fraction. You are looking for a sweet spot, and it rarely takes more than two adjustments to find.
Keeping it working
Rinse the cover after a bath and wipe it dry. That single habit prevents most water spotting and limescale marks on chrome.
Every few weeks, unscrew the bolt set, pull out the hair that has gathered, rinse everything under warm water and put it back. This is the maintenance that actually matters, because hair in the mechanism is the number one cause of a plug that stops latching.
Use mild soap only. Bleach, scouring pads and aggressive limescale products all attack chrome plating and harden rubber. If you have serious scale, use a gentle descaler briefly and rinse thoroughly afterwards.
If the seal eventually hardens and starts weeping, that is the rubber ageing rather than the mechanism failing. At the price of a whole new plug, replacing the lot is usually simpler than hunting down a replacement ring.
The short version
Measure your bath drain hole first. If it is the standard 43mm, this 69mm chrome click clack bath plug will screw straight in and give you a proper seal again.
The brass bolt is what makes it worth having over the cheapest option on the shelf, because brass keeps its spring and does not go soft in a wet bathroom. Rubber seal rings do the watertight work, and the detachable bolt means you can clean the whole thing in a couple of minutes.
It is a bath part. Not a basin part. Get that one check right and the rest is a five-minute job that gets your hot bath staying hot again.